Manage Customers

Manage Customers
The Manage Customers section allows you to create and maintain customer records and manage the customer sites and shipping destinations associated with each customer. Customers are a core component of pricing, catalogs, EDI transactions, and order processing throughout the application.
From this section, you can define customer identifiers, maintain customer details, and manage addresses and contacts linked to each customer.
Accessing Manage Customers
To access Manage Customers:
- From the top navigation bar, select Customer.

- Choose Customers from the dropdown menu.

The Manage Customers screen will display, showing a list of existing customers and their associated details.
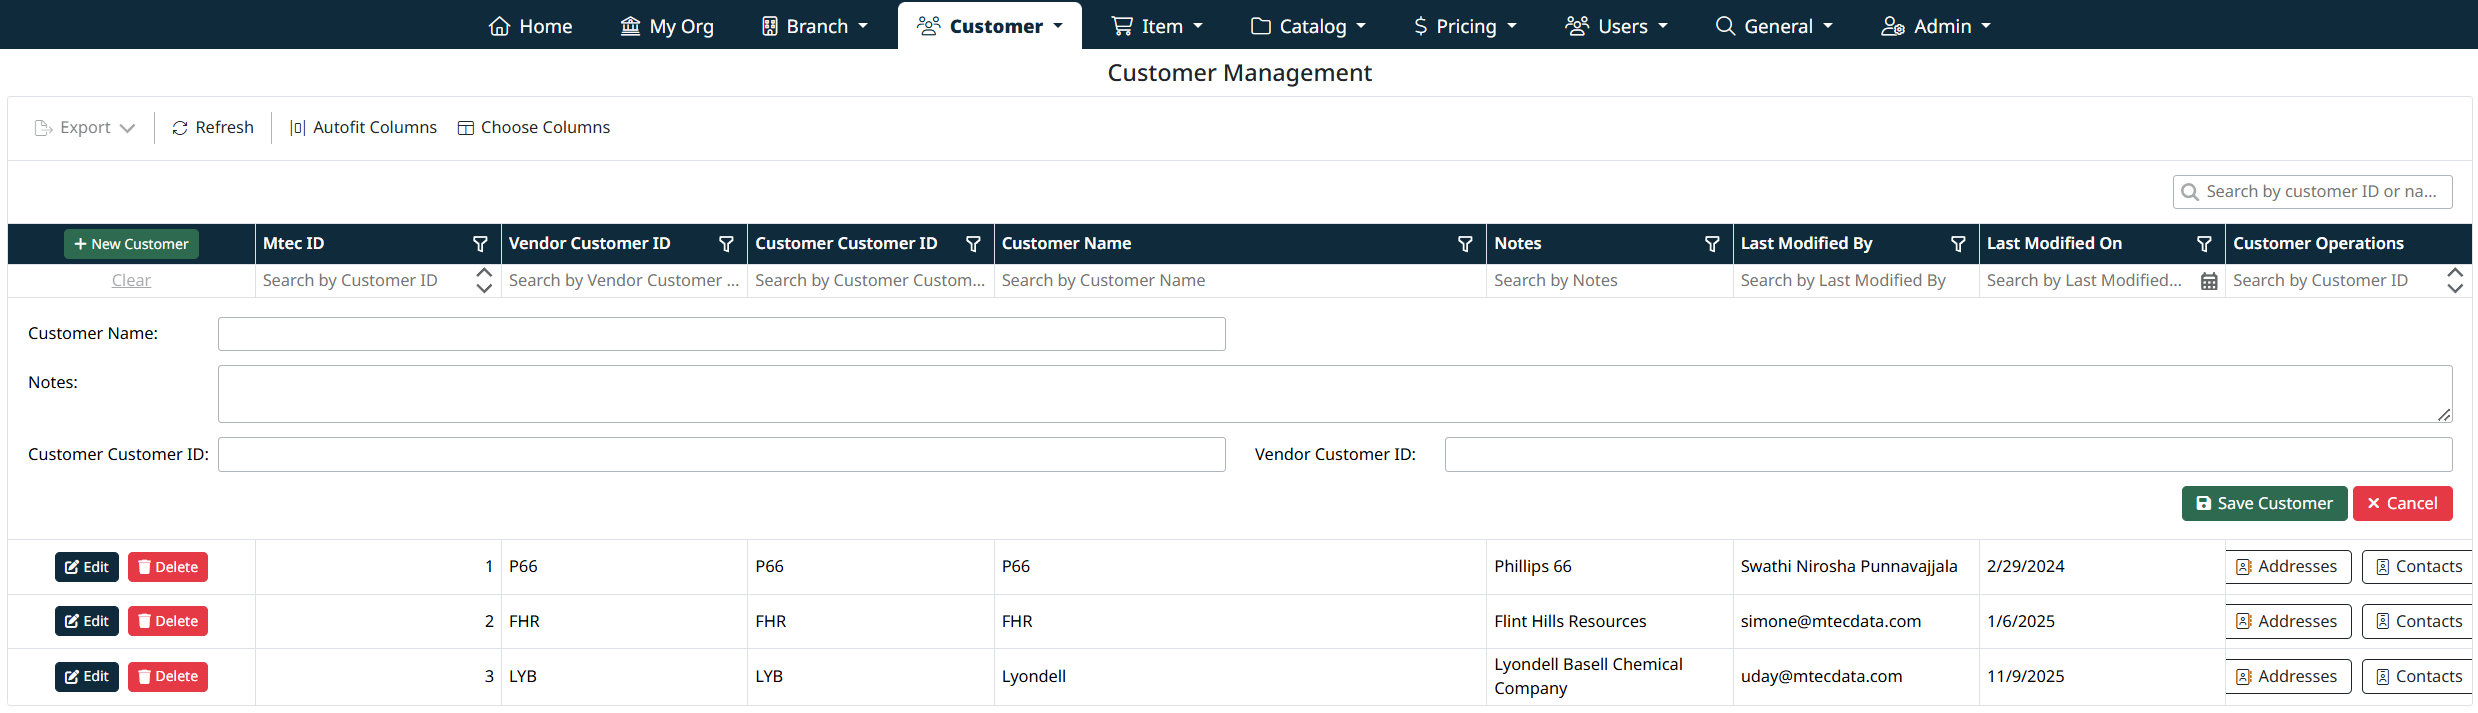
Manage Customers Screen Overview
The Manage Customers screen displays all customers available within your organization and provides tools to create, edit, search, and maintain customer records.
Each customer row includes:
- Internal and vendor customer identifiers
- Customer name and notes
- Last modified information
- Quick access to customer addresses and contacts

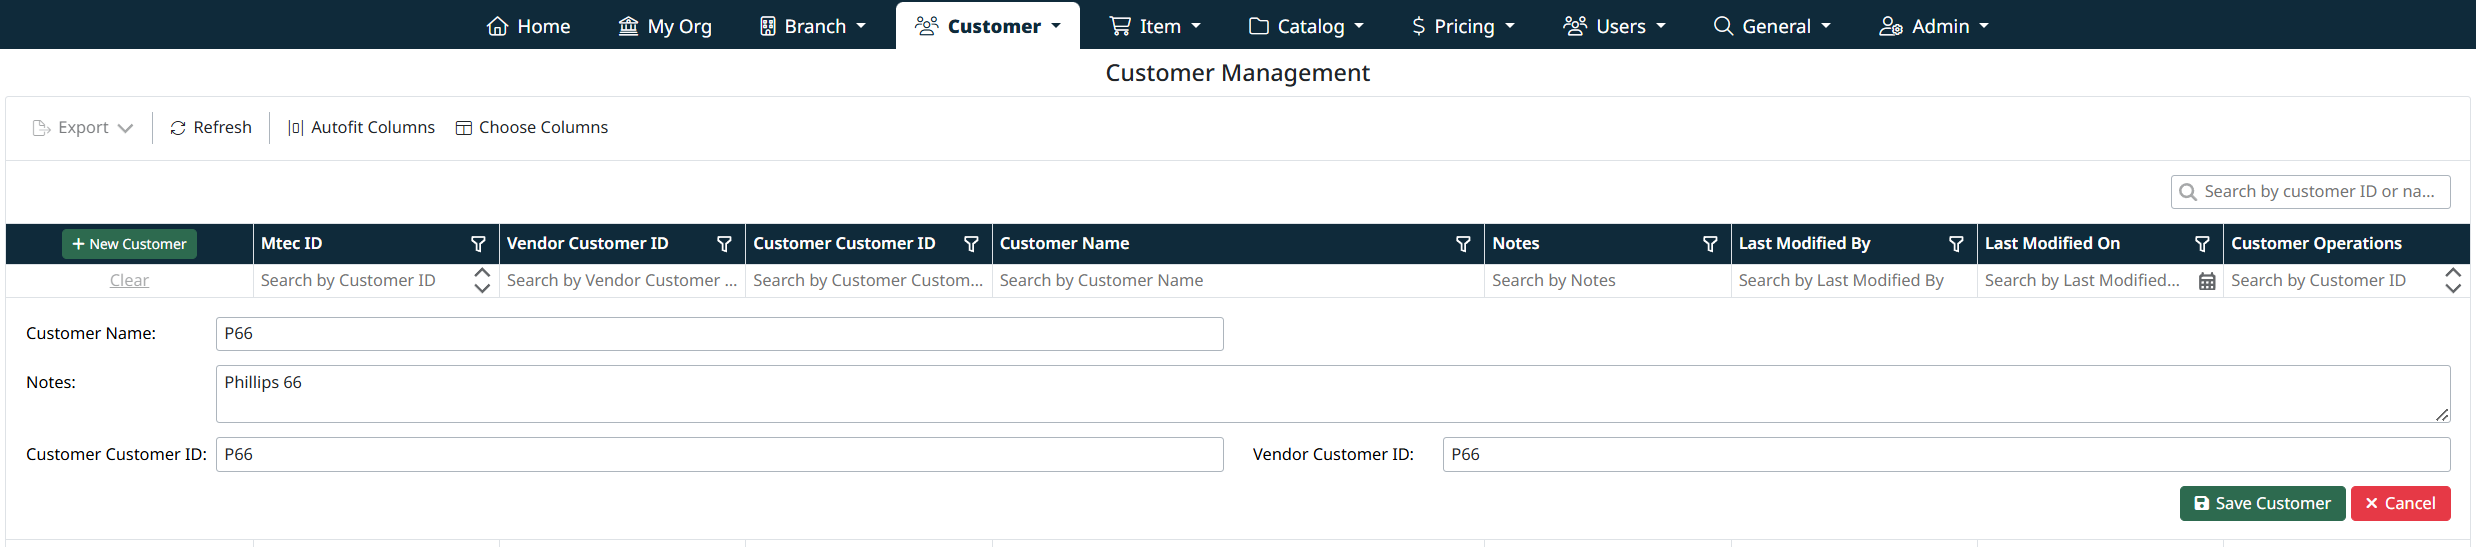
Create a New Customer
- Select + New Customer to add a new customer record.
- Enter the required customer identifiers and name.
- Save the record to make it available throughout the system.
Edit or Delete a Customer
- Select Edit to update customer details.
- Select Delete to remove a customer record.
- A confirmation prompt will appear before deletion.

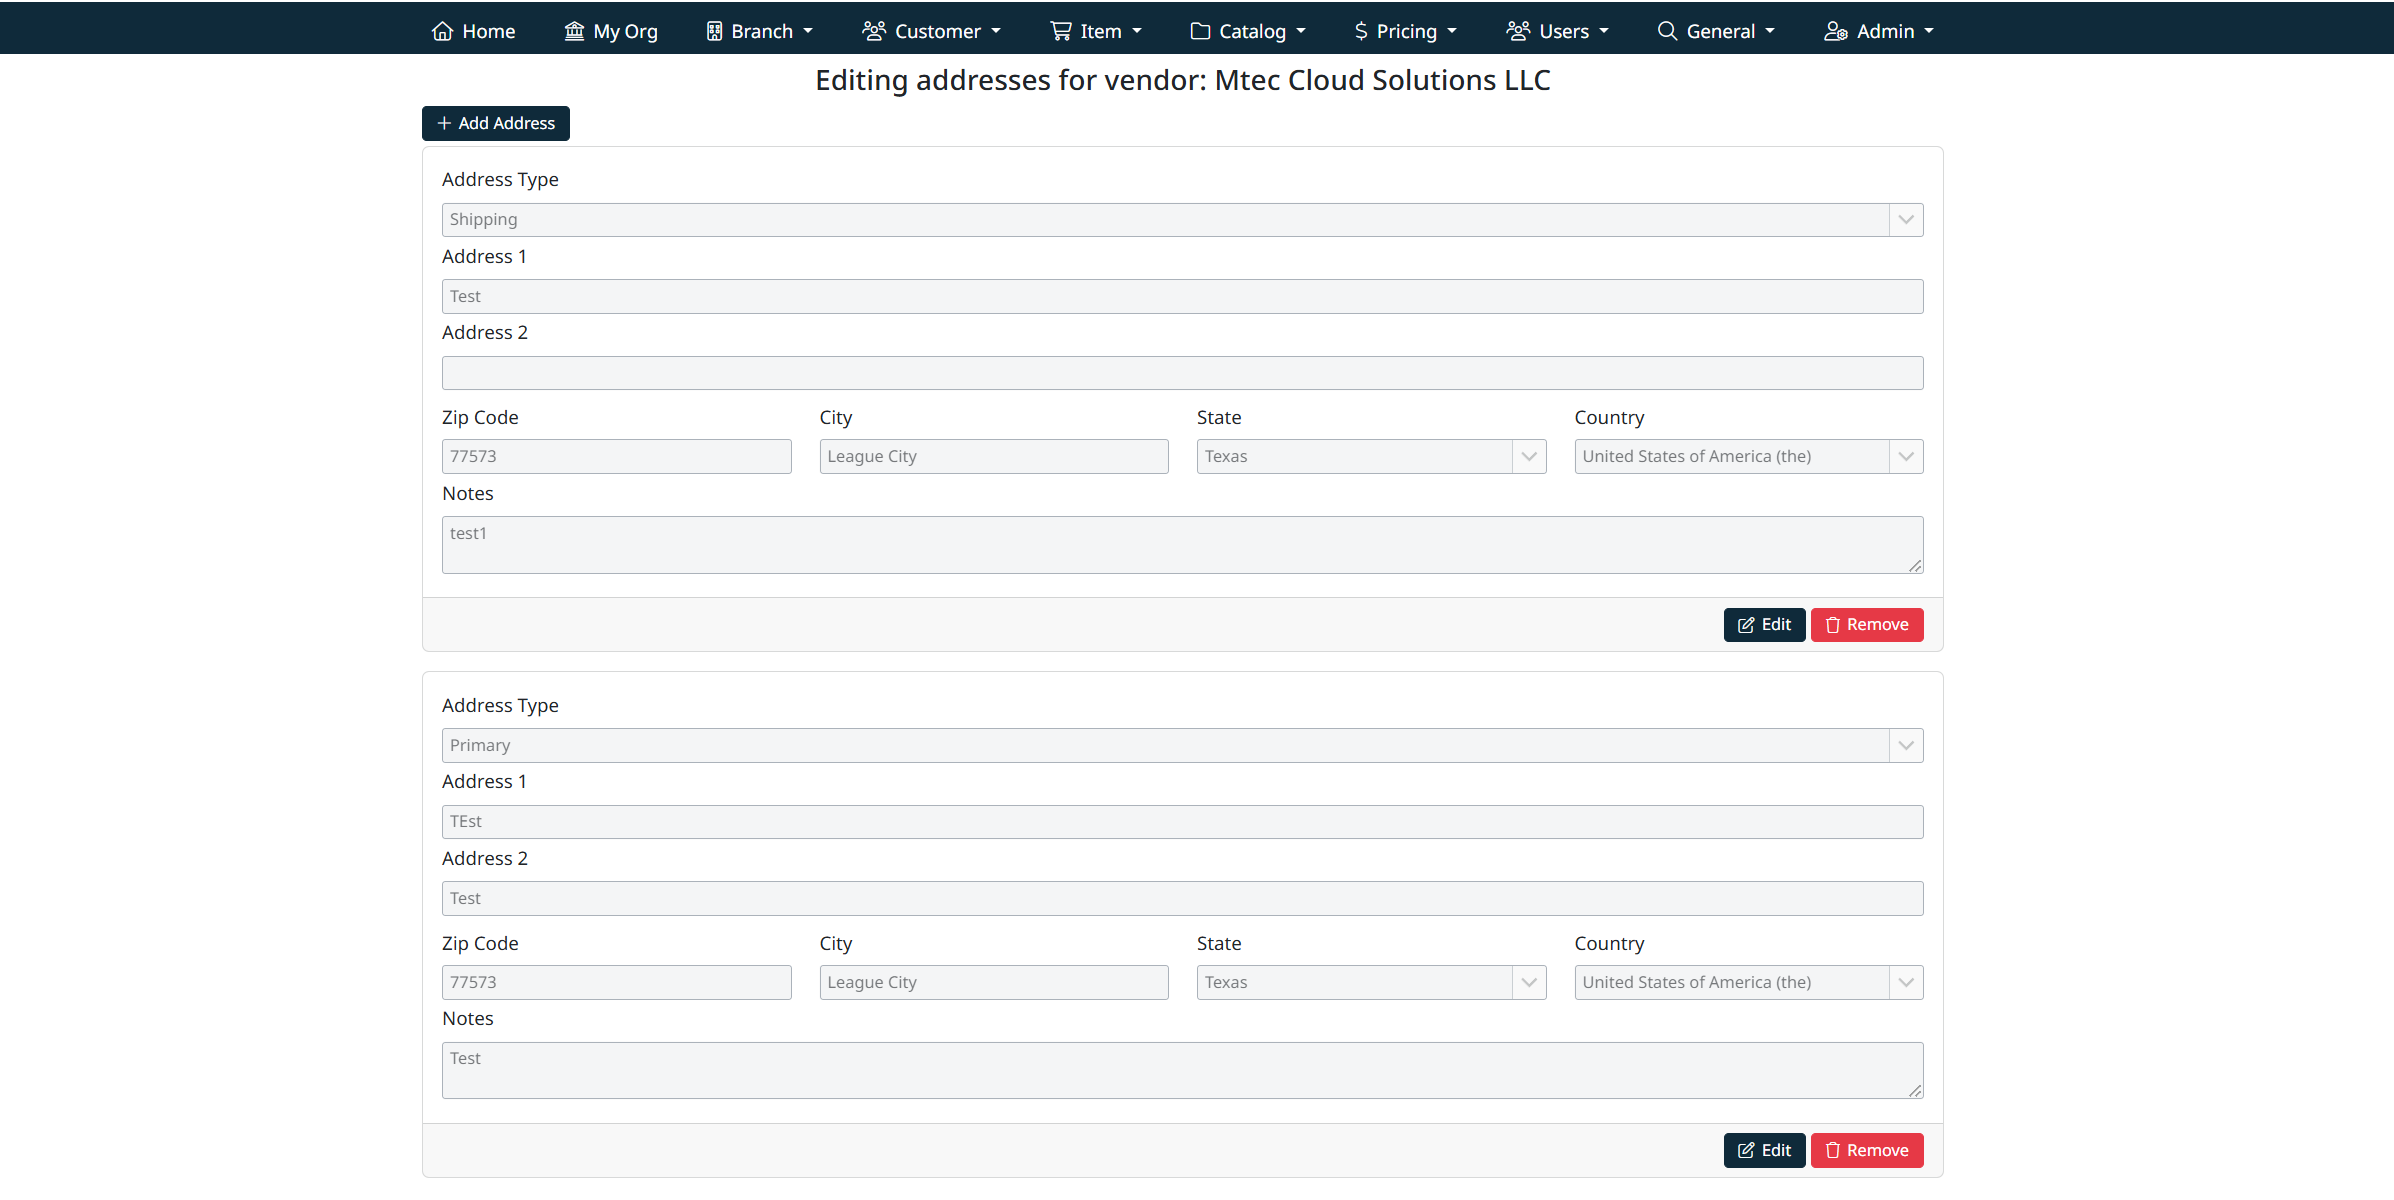
Managing Customer Addresses
Each customer can have one or more addresses associated with it.
- Click Addresses in the Customer Operations column.
- The system will open the Address Management screen.
- From here you can:
- Add new addresses
- Edit existing addresses
- Remove addresses as needed
Note: Customer address management uses the same address interface and behavior as My Organization - Managing Organization Addresses
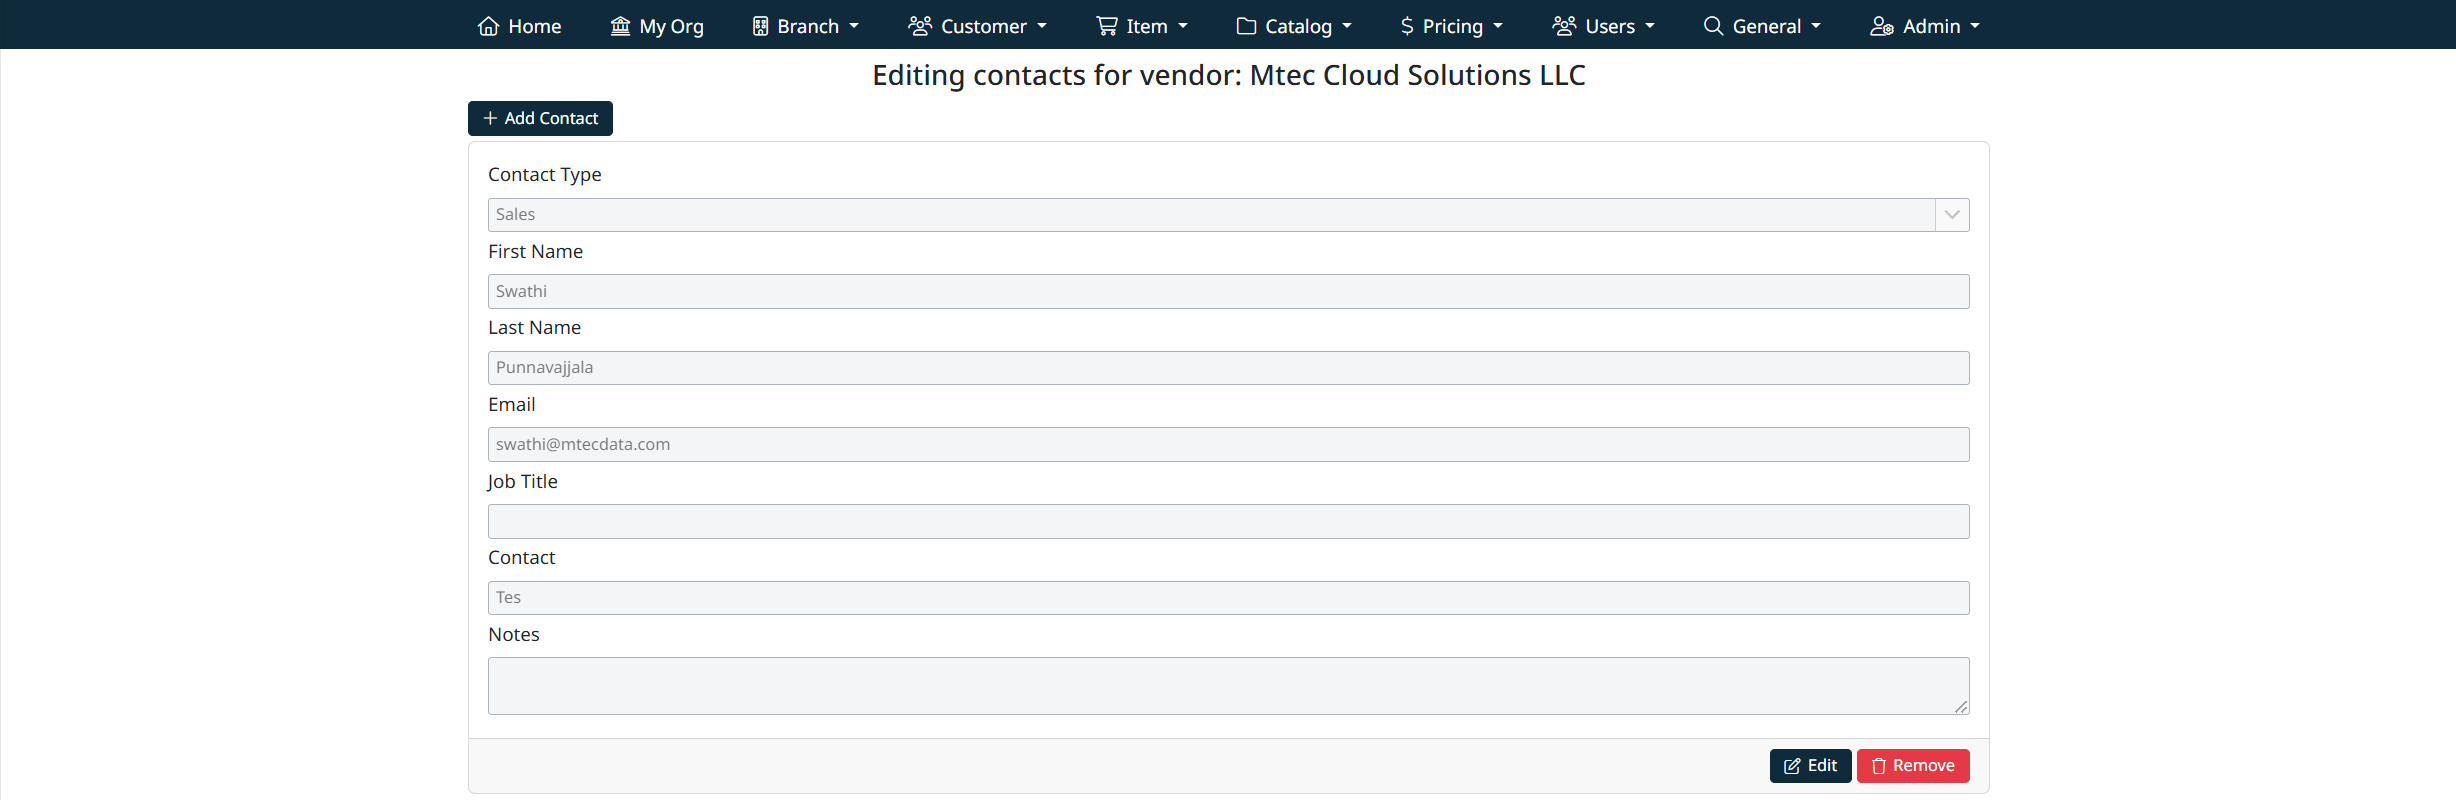
Managing Customer Contacts
Each branch can also maintain its own contact records.
- Click Contacts in the Contact Operations column.
- The Contact Management screen will open.
- You can:
- Add contacts for the branch
- Edit contact details
- Remove contacts when no longer required
Note: Branch contact management uses the same contact interface as My Organization - Managing Organization Contacts, ensuring consistency across the system.
Navigation Grids, Search and Filters
This screen uses a standard grid controls for searching, filtering, sorting, and managing records.
The grid provides the following tools:
- Column filters to narrow results by specific fields (such as IDs, names, notes, and modification details)
- Inline search fields below column headers for quick, column-specific filtering
- Global search bar for keyword-based searching across visible data
- Column sorting by clicking column headers
- Grid actions including export, refresh, auto-fit columns, and column visibility customization
For detailed instructions on using grid search, filters, and column controls, see Navigating Grids, Search, and Filters.
Created with the Personal Edition of HelpNDoc: Easily create Help documents