Manage Items

Manage Items
The Manage Items screen is used to create, maintain, and organize individual items within the system. Items represent the products that will appear in catalogs, search results, and customer-facing applications.
From this screen, administrators can:
- Create new items
- Edit existing item details
- Assign items to categories
- Maintain manufacturer and unit of measure information
- Remove items that are no longer required
Navigation
To access Item Management:
- From the top navigation bar, select Item.
- Click Items.
The Items Management screen will display.

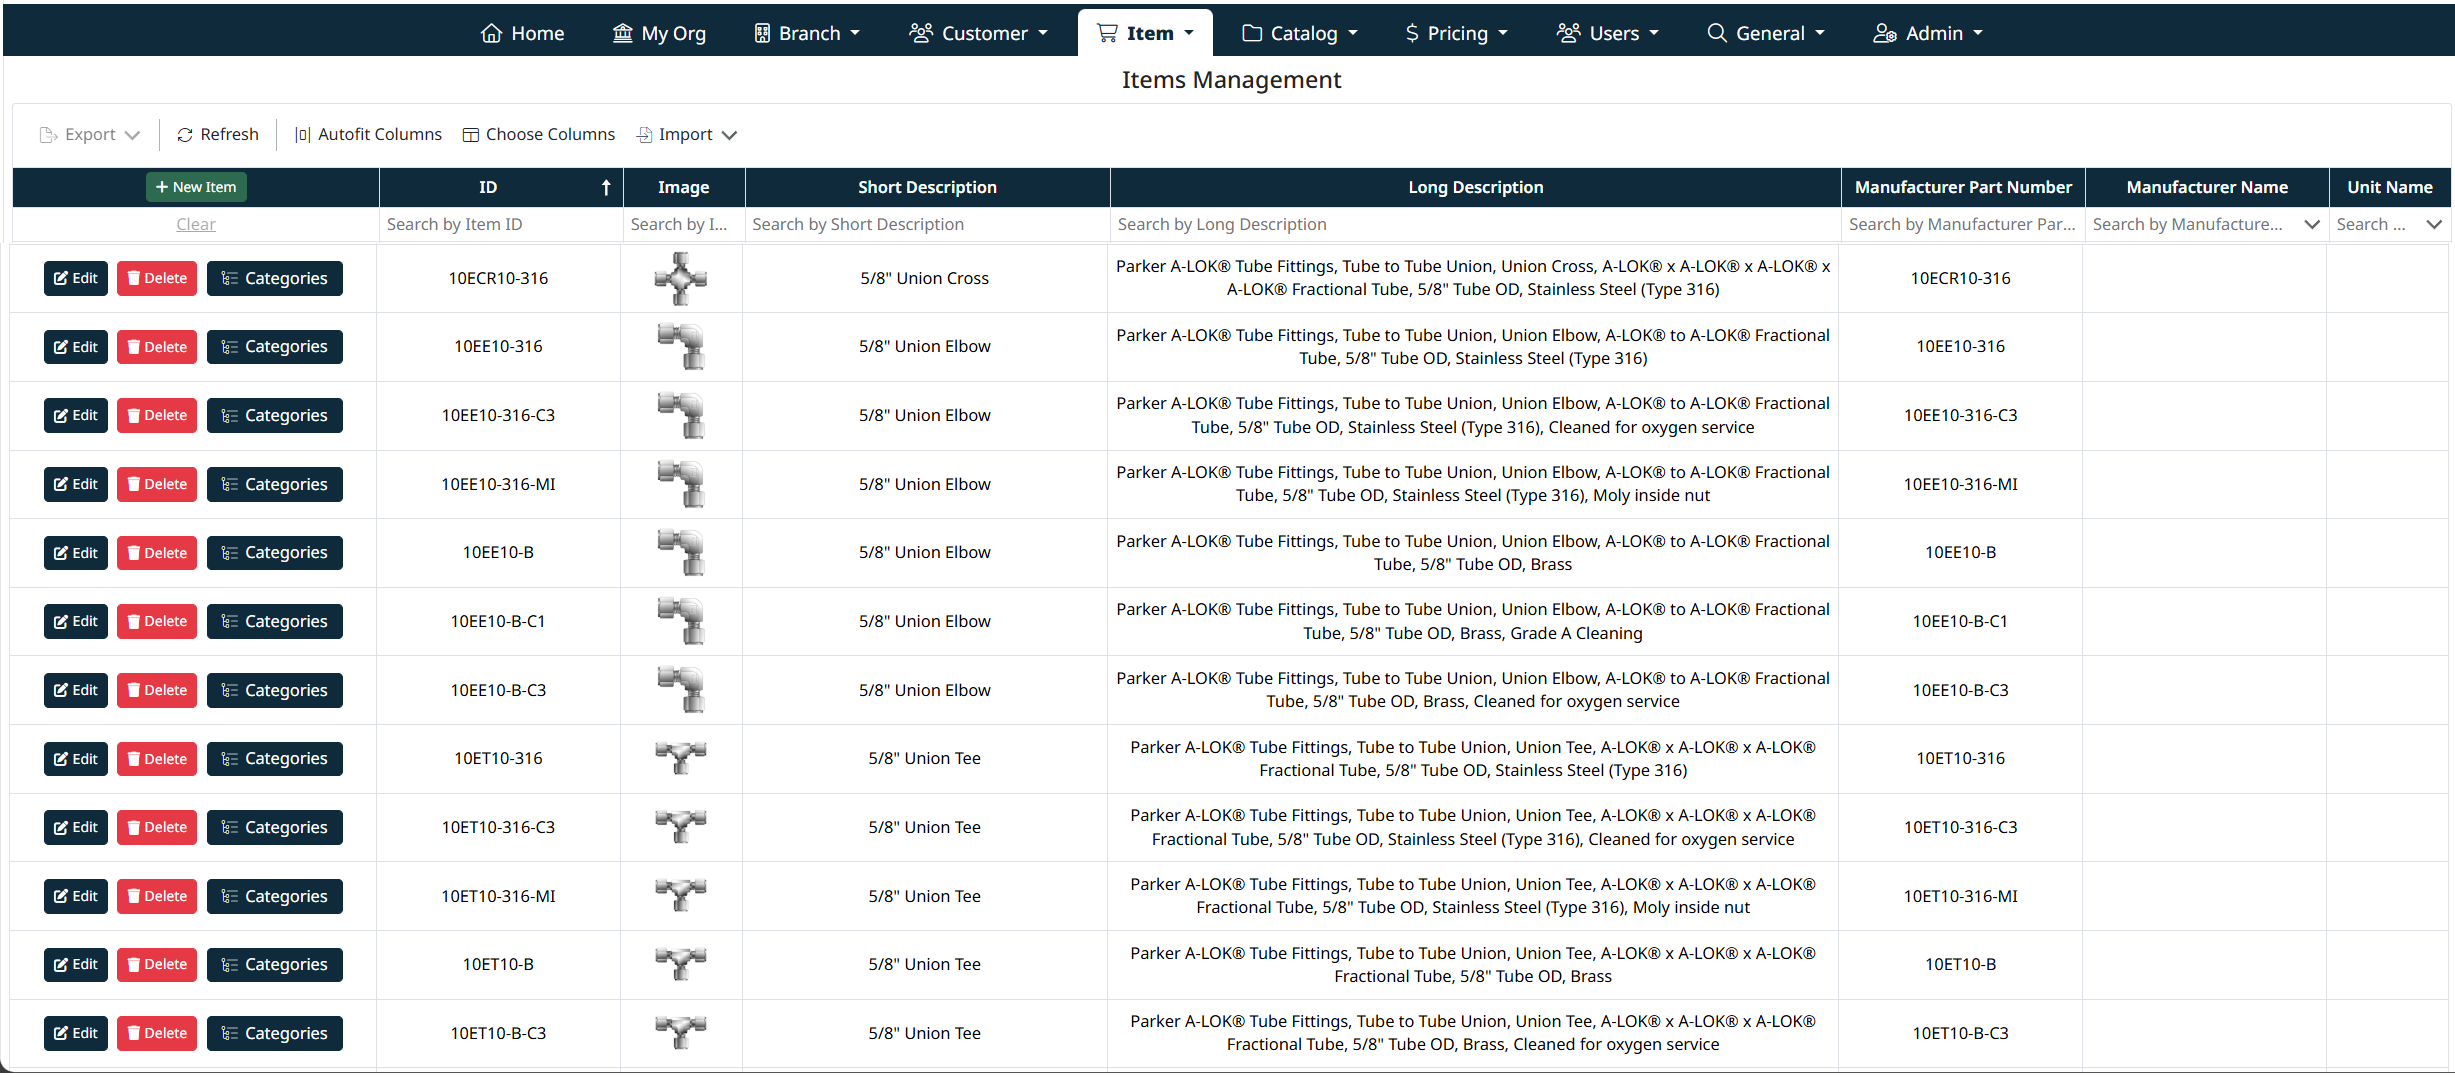
Items Management Overview
The Items Management screen displays a searchable grid of all items configured in the system.
Each row represents a single item and includes:
- Item ID
- Item image
- Short and long descriptions
- Manufacturer information
- Unit of Measure
- Action buttons for item management
Standard grid tools such as search, filtering, sorting, export, and column selection are available on this screen.
For detailed instructions on using grid controls, see Grid Search, Filter, and Navigation .
.
Creating a New Item
To create a new item:
- Click + New Item.
- The item entry form will appear above the grid.
- Complete the required fields:
- Item ID – A unique identifier for the item
- Manufacturer – Select the manufacturer from the dropdown (optional)
- Manufacturer Part # – The manufacturer’s part number (optional)
- Unit – Select the unit of measure for the item
- Image URL – URL pointing to the item image (optional)
- Short Description – A concise item description
- Long Description – A detailed item description
- Click Save Item to create the item.
- Click Cancel to discard changes.
Once saved, the new item will appear in the grid.

Editing an Item
To edit an existing item:
- Locate the item in the grid.
- Click Edit.
- The item’s details will load into the editable form above the grid.
- Update the required fields as needed.
- Click Save Item to apply changes.
- Click Cancel to exit edit mode without saving.
All edits are immediately reflected in the item grid once saved.

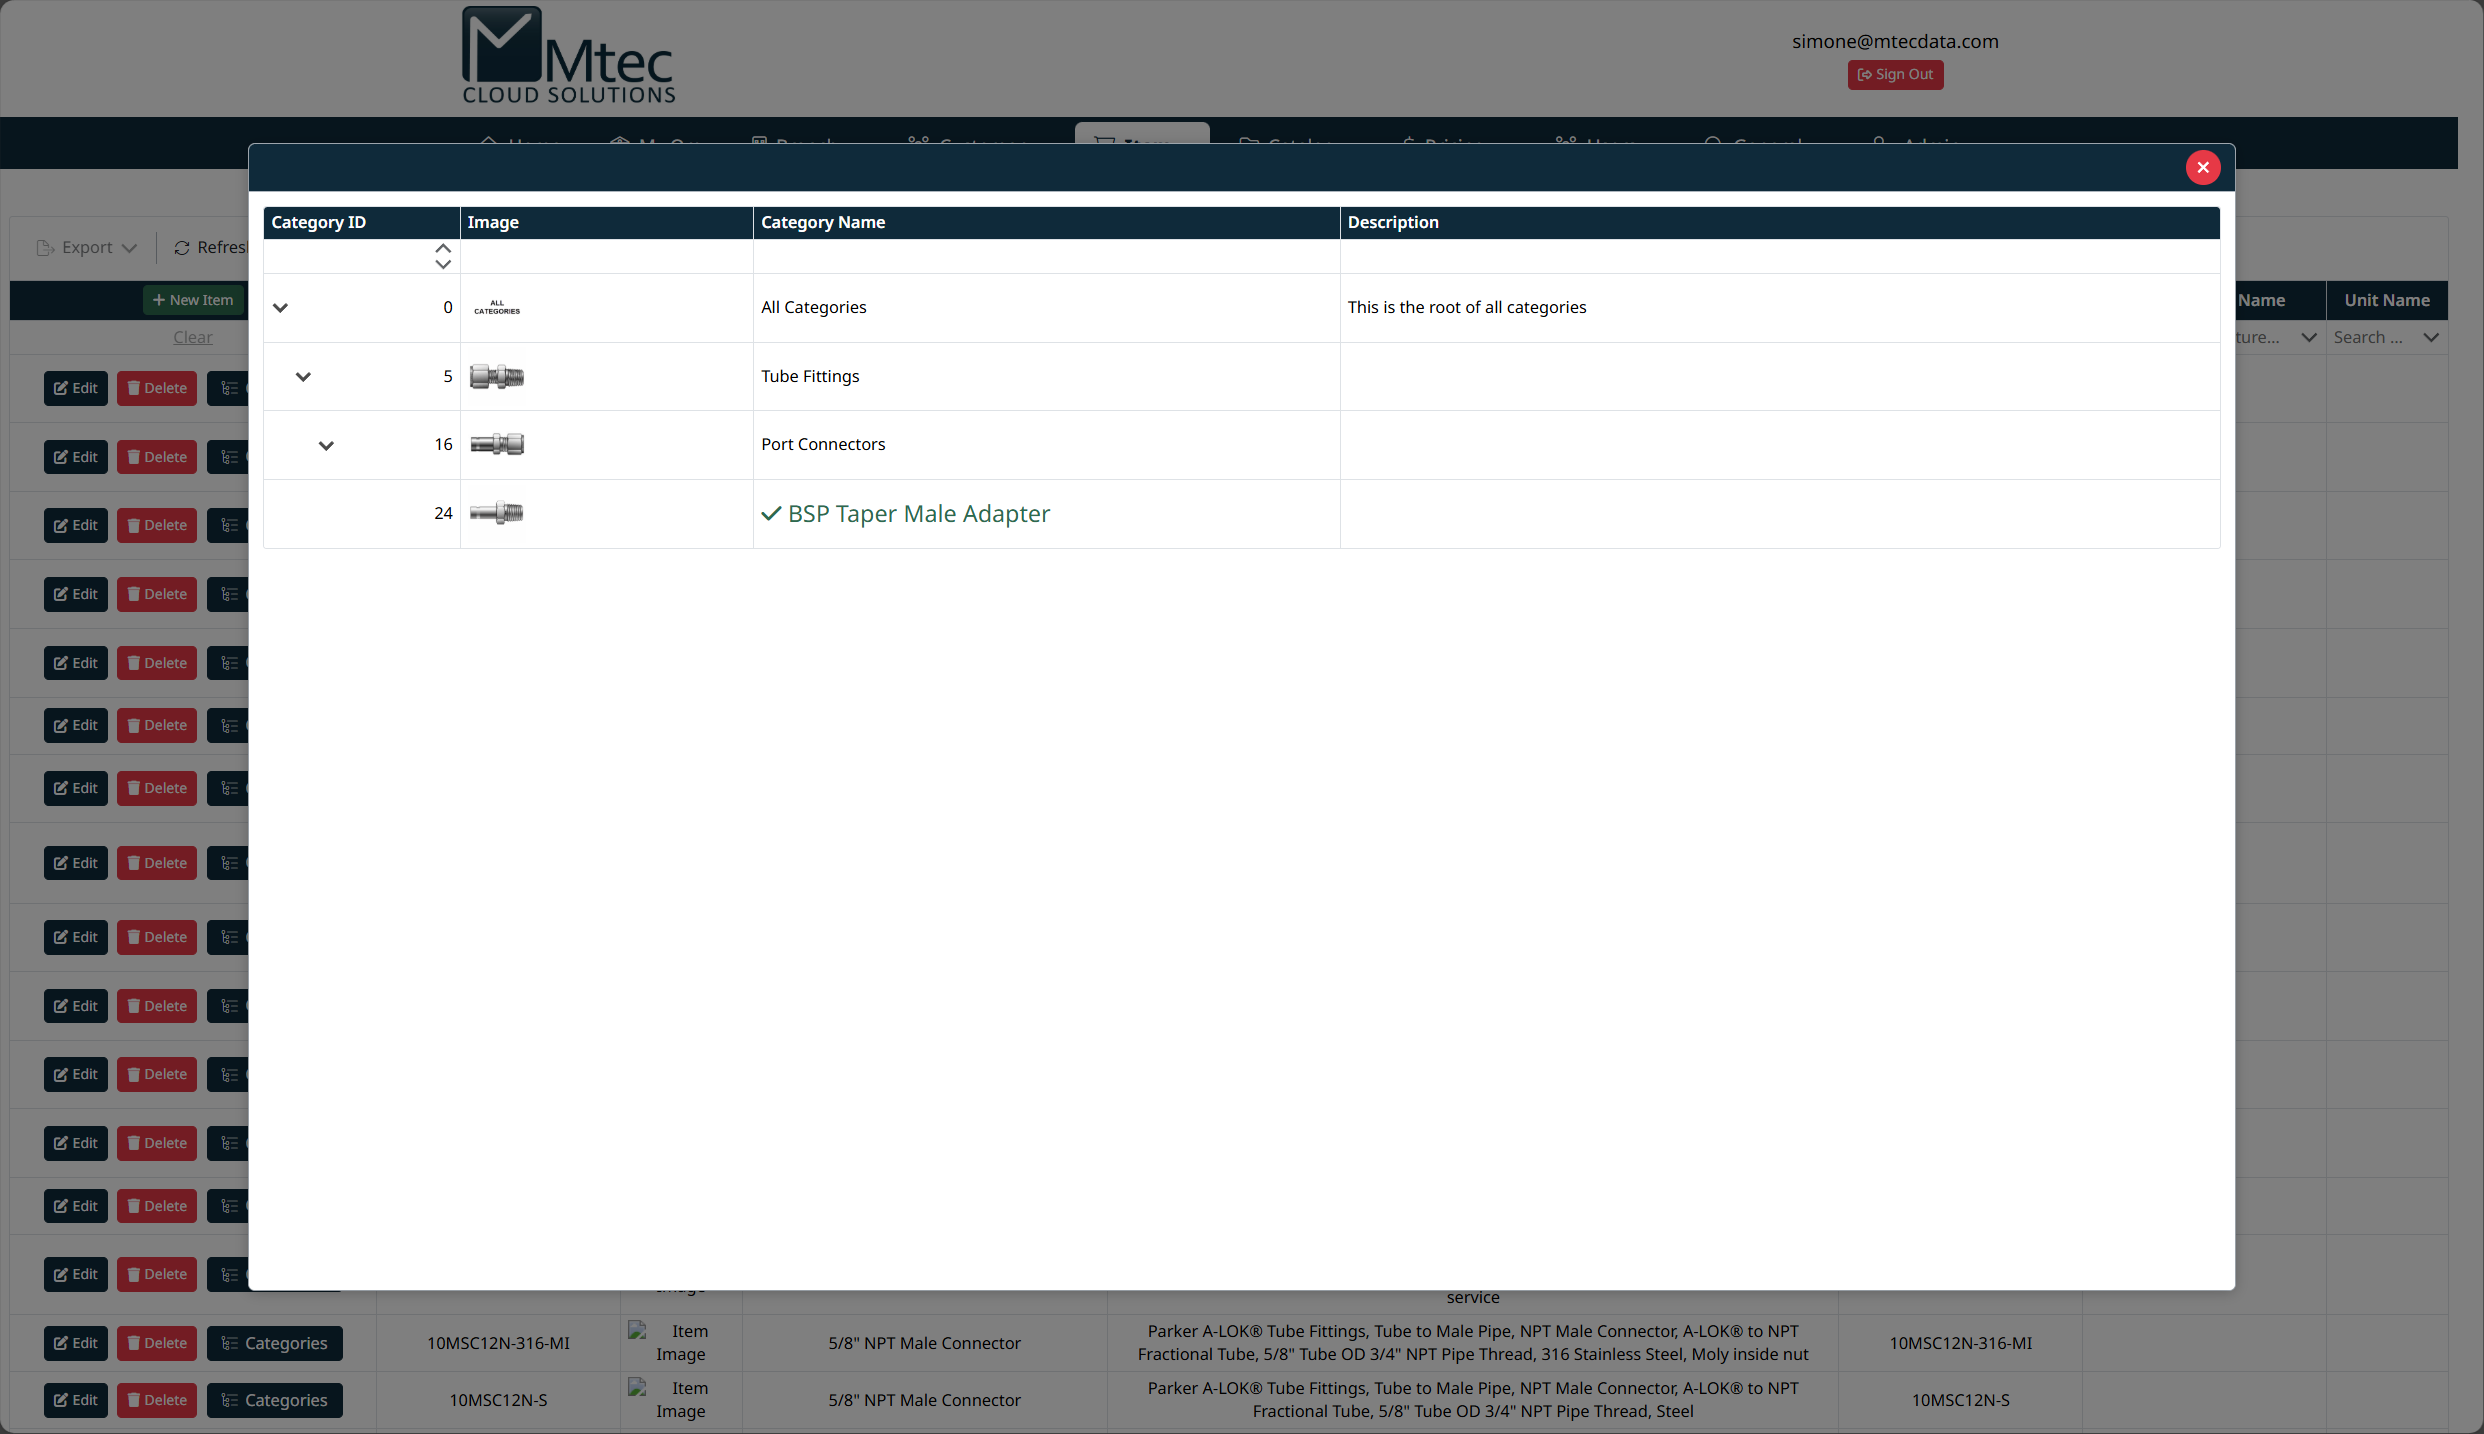
Assigning Categories to an Item
Items can be associated with one or more categories.
To manage item categories:
- Locate the item in the grid.
- Click Categories.
- The category selection modal will open, displaying the category hierarchy.
- Expand categories as needed and select the appropriate categories.
- Confirm your selection to save category assignments.
- Close the modal to return to the Items Management screen.
Category assignments determine where items appear within catalogs and search results.
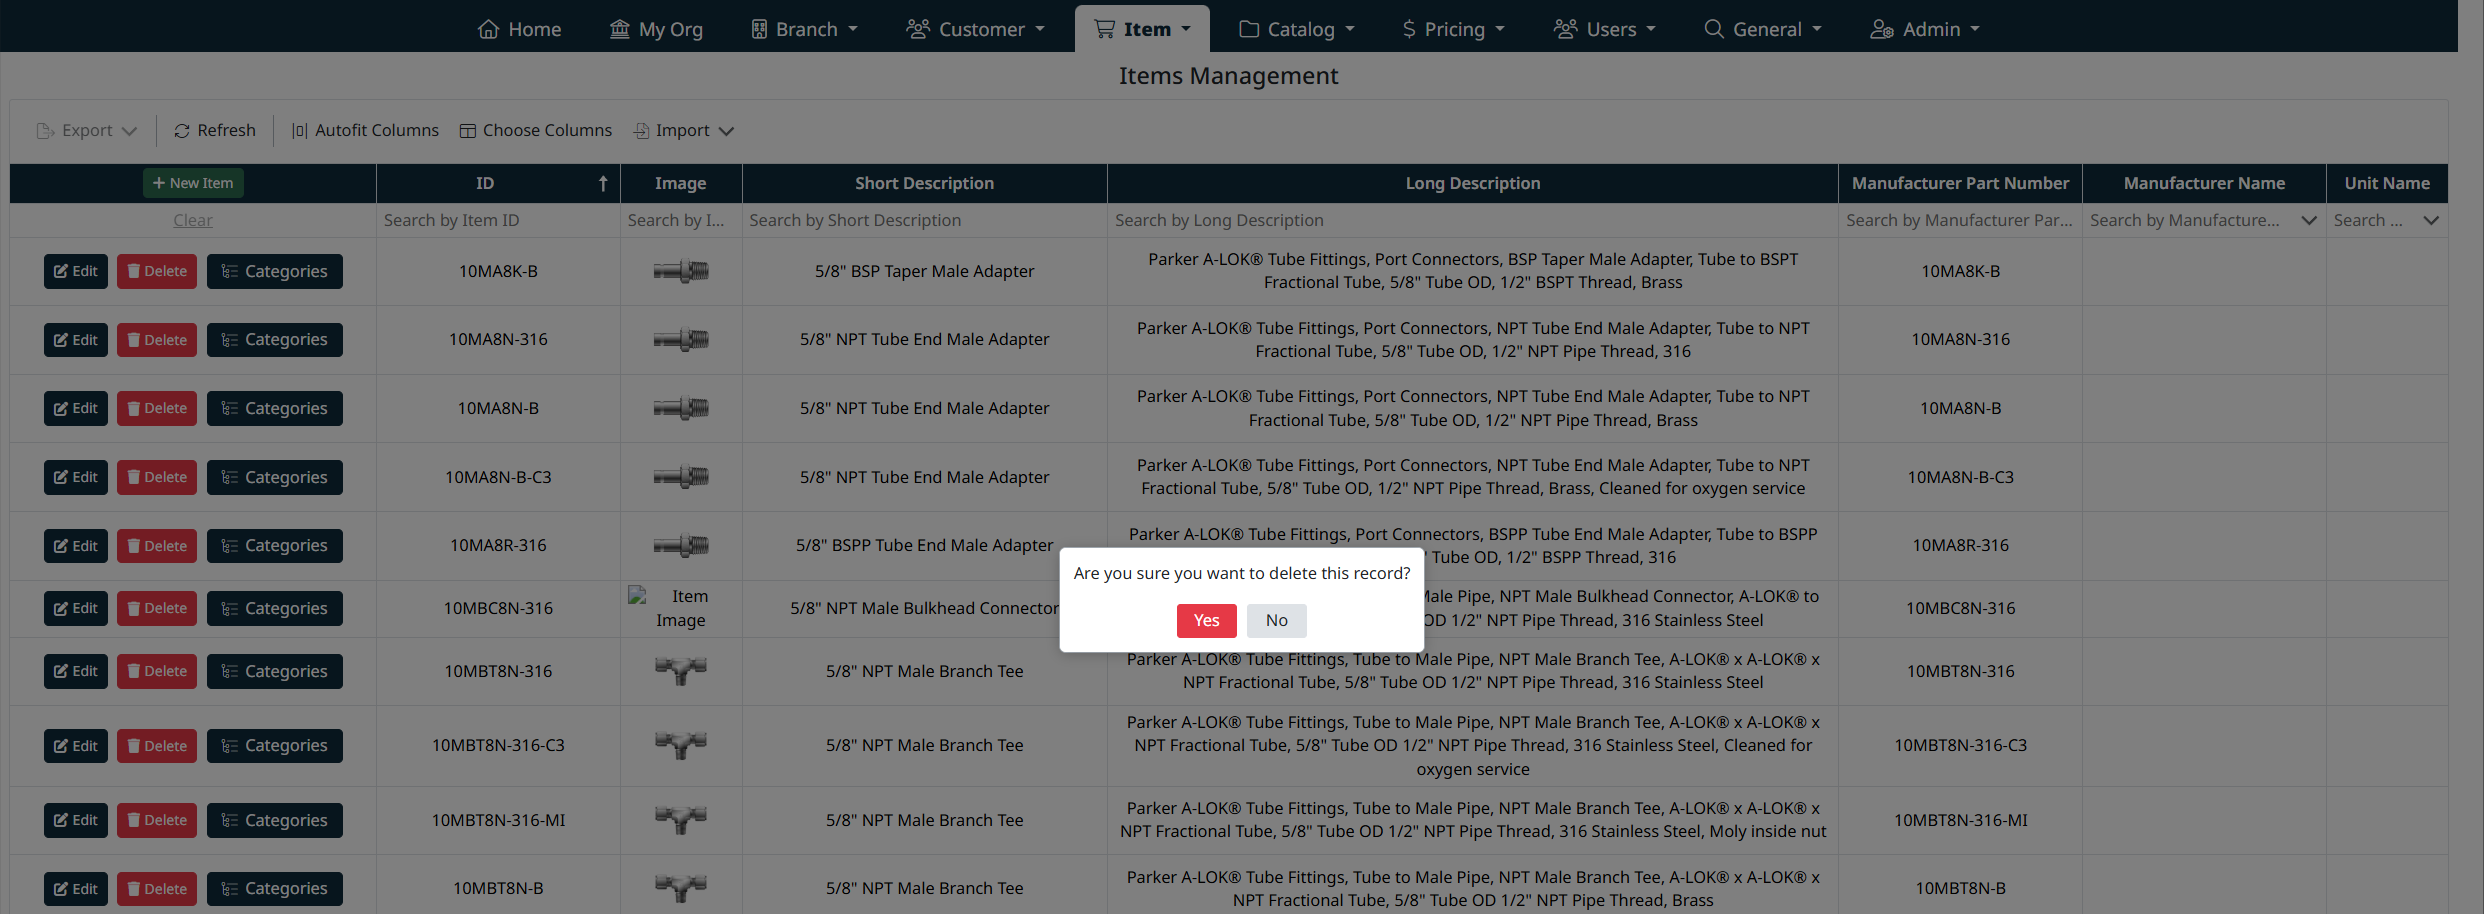
Deleting an Item
To delete an item:
- Locate the item in the grid.
- Click Delete.
- A confirmation dialog will appear.
- Click Yes to confirm deletion or No to cancel.
Note: Deleting an item permanently removes it from the system. Ensure the item is not in active use before deleting.
Item Images
The Image URL field allows you to associate an external image or document with an item. This image is used for display in the item grid, item details, and customer-facing views where applicable.
Supported File Types
The Image URL can reference the following file types:
- Image files (for example: .png, .jpg, .jpeg, .gif)
- PDF files (for technical drawings or specification sheets)
Storage Location
Images and documents are typically stored in cloud-based blob storage (for example, Azure Blob Storage).
The URL provided must:
- Be a direct, publicly accessible URL
- Not require authentication to view
- Point directly to the file (not a folder or landing page)
Example:
https://<storage-account>.blob.core.windows.net/<container>/<filename>.gif
Using Image URLs
To add or update an image URL:
- Click Edit on the item or select + New Item.
- Paste the full URL into the Image URL field.
- Click Save Item.
Once saved:
- Image files will display as thumbnails where supported.
- PDF files will be accessible via a document link or preview, depending on the context.
Best Practices
- Use clear, consistent file naming for images and documents.
- Ensure images are sized appropriately for web display.
- Verify the URL loads correctly in a browser before saving.
- Store all item-related media in a centralized blob container for easier maintenance.
Common Issues
- Image not displaying: Verify the URL is publicly accessible and points directly to the file.
- Broken link: Confirm the file has not been moved or renamed in blob storage.
- Unsupported format: Ensure the file type is one of the supported formats listed above.
Best Practices
- Use clear and consistent Item IDs to align with manufacturer or ERP systems.
- Populate Short Descriptions with customer-friendly text.
- Use Long Descriptions for detailed specifications and searchable keywords.
- Assign categories carefully to ensure accurate catalog navigation.
- Avoid deleting items that may still be referenced by catalogs or customer sites.
Navigation Grids, Search and Filters
This screen uses a standard grid controls for searching, filtering, sorting, and managing records.
The grid provides the following tools:
- Column filters to narrow results by specific fields (such as IDs, names, notes, and modification details)
- Inline search fields below column headers for quick, column-specific filtering
- Global search bar for keyword-based searching across visible data
- Column sorting by clicking column headers
- Grid actions including export, refresh, auto-fit columns, and column visibility customization
For detailed instructions on using grid search, filters, and column controls, see Navigating Grids, Search, and Filters.
Created with the Personal Edition of HelpNDoc: Effortlessly Create High-Quality Documentation with a Help Authoring Tool